View fullsize

Disclaimer: I received Brilliant Reflective to review as part of being a BibRave Pro. Learn more about becoming a BibRave Pro (ambassador), and check out BibRave.com to review find and write race reviews.
Simple and monotone was the look of the Runner’s World Jan/Feb issue’s Run Outfit of the Day. Too bad that’s not my style, I’m afraid I’d blend into the streets and sidewalks. See, I want to be seen! My running wardrobe consists mostly of ultra-bright colors, neon accents and — when possible — reflective details. I need to be seen because my miles happen mostly during the pre-sunrise or post-sunrise. This is what we call working-married-mom-life. Family comes first and I need to run while they sleep or after dinner during down time.
Not all clothing or shoes for that matter have the reflection that I yearn for. Um, hello Brooks Levitate? Running shoe purchases are big purchases in my world. I didn’t bat an eyelash when I paid $150 for my silver Levitates back in October 2017. When I got home I noticed something that was different from the other Brooks I’ve owned in the past. Where was the reflection details? I knew they weren’t going to be as bright as my Altra Impulse Flash, but these didn’t give one bit of reflective detail! Still, I wore them during the dark hours and honestly I didn’t feel all that safe in them.
As a BibRave Pro I get the opportunity to test, try and review new products. When the team was asked to test Brilliant Reflective, I jumped on the opportunity. This was my time to make my Levitate’s shine! Application was easy, their instructions were straightforward, and the results are brilliant.
Here is my step-by-step process for applying Brilliant Reflective iron-on to my Brooks Levitates:
View fullsize

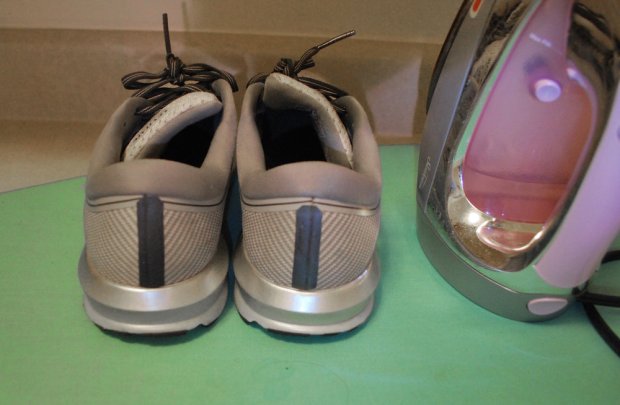
Step 1: Read instructions. Twice. Clear off your work space and gather your supplies. Heat up iron and face it away from you. One thin strip of black Brilliant Reflective cut in half was used or my Levitate’s. Gently clean the surface of your shoes.

Step 2: Place the strip on the area you want reflection. This was tricky for me because of my shoe’s convex shape at the heel. Be very careful when ironing on these rounded surfaces. Gently, I ironed the bottom of the strip first then the top for 30-60 seconds. Not seen is the paper towel I placed in between the strip and iron.
Step 3: Repeat on other shoe. After the strips cooled for a minute, remove the clear layer from them. Time to shine!
The Brilliant Reflective strips have been holding up well on my shoes. I’ve put about 30 miles on them so far and they have been sticking great. If lifting occurs, all I need to do is re-iron that area. It is a product for me because I need to be seen during my low-light runs and this is an easy way to achieve that. The other areas I applied the iron-on strips to were my Foxelli headlamp (see my application process on IG) and the stick-on to my face! If you too run in the dark, I recommend that you give Brilliant Reflective a try. Save a few dollars by applying code BRP25 to save 25% off of all Multi/Assortment Packs. Shine bright friends!
